The 7-Step Dishwasher Leak Floor Repair Sequence
Every job we run in Ingalls follows the same backbone. Skip a step and you trap moisture under the finish.
- Stop the source. Close the hot water angle stop under the sink. Kill power at the breaker.
- Pull the dishwasher forward. Disconnect the drain hose and supply line before sliding it out.
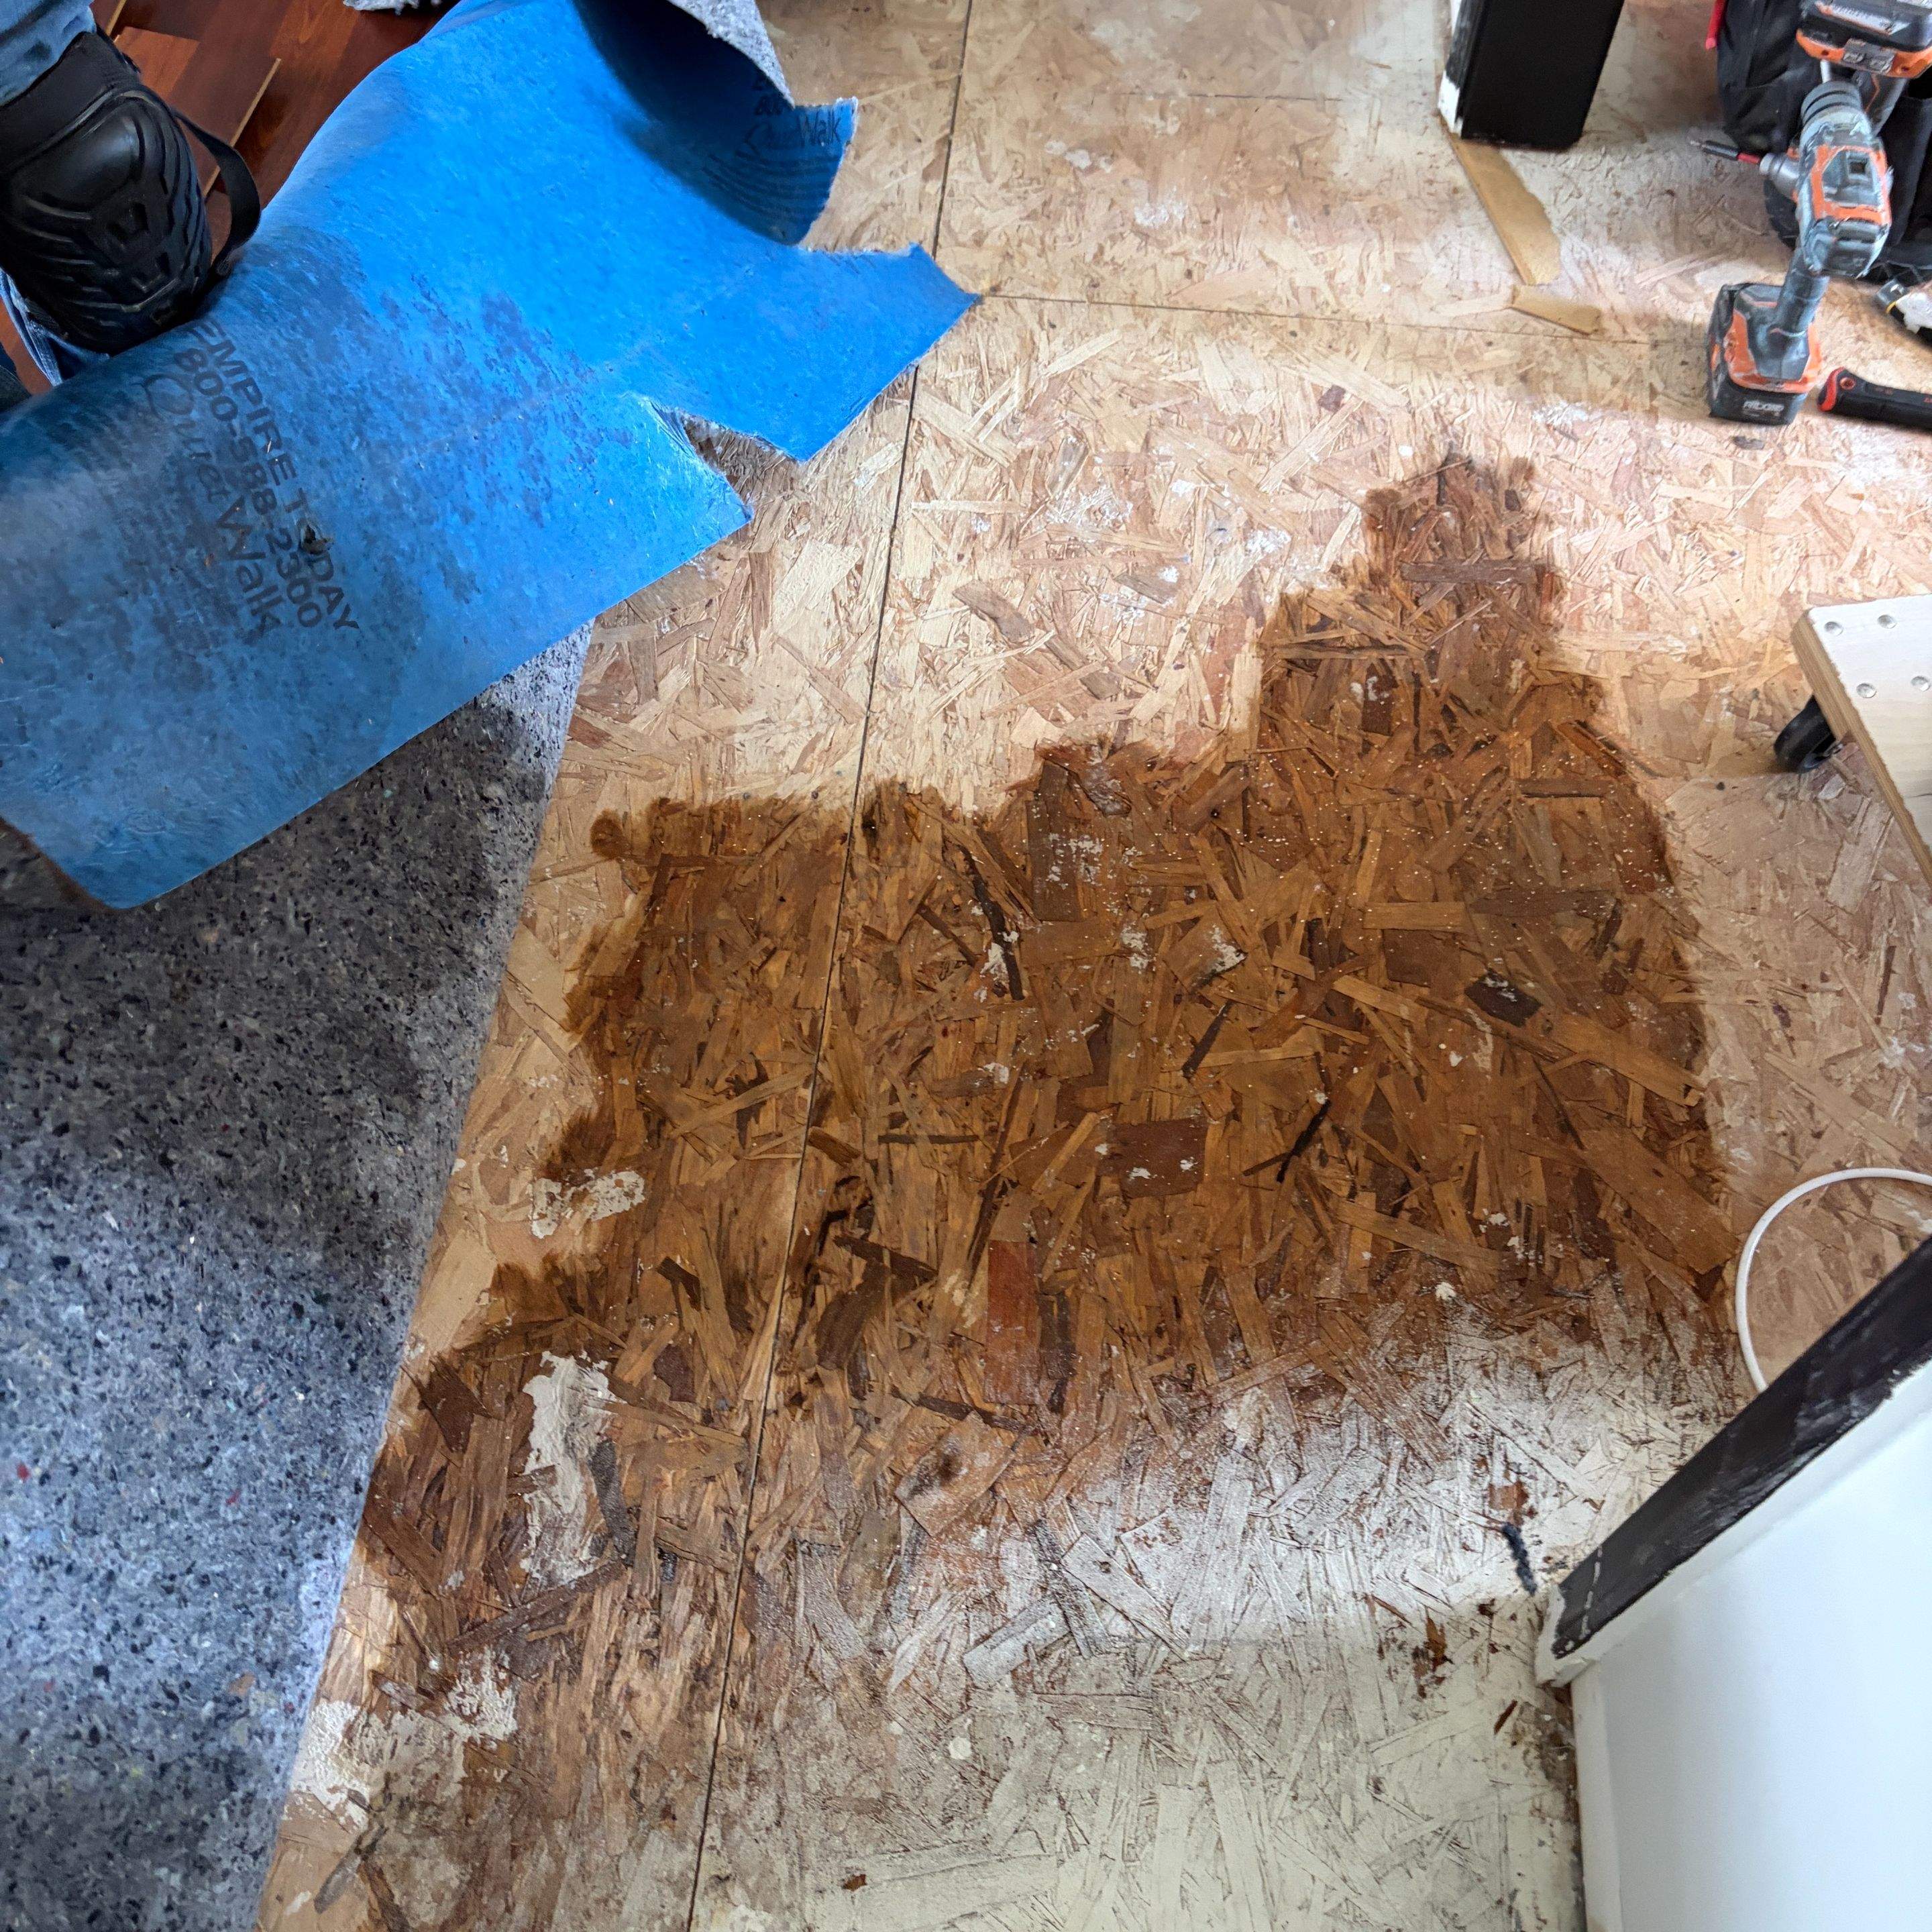
- Inspect the cavity. Check the subfloor, side cabinet walls, and the back of the toe-kick.
- Map the moisture. Use a pinless meter to find the wet footprint, not just the visible stain.
- Extract and dry. Set air movers and a dehumidifier sized to the affected square footage.
- Repair or replace. Refinish hardwood, swap laminate planks, or cut and patch subfloor.
- Reinstall and test. New supply line, new shutoff if corroded, leak test for 24 hours.
Signs Your Floor Is Already Compromised
- Cupped or crowned hardwood planks within 3 feet of the dishwasher
- Dark staining along the seams of laminate or LVP
- Soft spots when you press your heel near the toe-kick
- Musty smell when you open the cabinet next to the dishwasher
- Peeling vinyl edges or lifting tile grout
- Warping at the bottom of the cabinet side panels
- Visible rust on the dishwasher feet or anti-tip bracket
- Discoloration on the ceiling of the basement or crawlspace directly under the kitchen
- Nail pops or screw heads lifting through the finished floor near the appliance
Common Leak Points on a Dishwasher
Knowing where the water came from changes the repair scope. We check these spots in order on every Ingalls call.
- Door gasket: Cracked or compressed seal lets water spray out during the wash cycle
- Inlet valve: Solenoid stuck open or hairline crack in the brass body
- Drain pump housing: Bearings fail and the seal weeps from the bottom
- Supply line: Braided stainless lines split where they kink behind the unit
- Drain hose clamp: Loose at the disposal connection, drips with every cycle
- Float switch: Stuck float lets the tub overfill and spill out the vent
- Tub corrosion: Pinhole rust on stainless or plastic tubs older than 10 years
What IICRC Category 2 Means for Dishwasher Water
Dishwasher leaks usually fall under Category 2, sometimes called gray water. The water has contacted food debris, detergent residue, and biofilm inside the unit.
- Category 1 (clean): supply line drip caught immediately, less than a few hours old
- Category 2 (gray): standing water from a drain line, pump, or door gasket leak
- Category 3 (black): dishwasher water mixed with sewage backup from a shared drain line
Category matters because it dictates whether porous materials get dried or removed. Our crews follow IICRC S500 water damage restoration standards on every Ingalls call, which is what your insurance carrier expects to see in the file.
Flooring Type and What Survives
- Solid hardwood: Often saves with mat drying systems if caught in 24 to 48 hours. Refinish after dry.
- Engineered hardwood: Top layer can survive, but delamination from the plywood core usually means replacement.
- Laminate: Almost always swells and must be replaced. Plank-by-plank if the run is short.
- Luxury vinyl plank (LVP): The plank itself is fine. The subfloor underneath is the concern.
- Ceramic tile: Tile survives. Grout and the cement board below may need replacement.
- Sheet vinyl: Usually replaced because adhesive fails once wet.
- Cork or bamboo: Highly absorbent. Replacement is almost always required.
Drying Equipment We Stage on Site
The right setup pulls moisture out before mold starts. A typical Ingalls kitchen job uses this stack.
- 2 to 4 low-profile centrifugal air movers aimed under the cabinet kick
- 1 LGR (low grain refrigerant) dehumidifier rated for 80 to 130 pints per day
- Hardwood drying mats with negative-pressure manifolds when planks are salvageable
- Cavity drying ports drilled into the toe-kick to reach the void under the cabinet
- HEPA air scrubber if Category 2 water sat longer than 48 hours
- Daily moisture logs tied to specific grid points on the floor plan
Cost Ranges in Central Indiana
Numbers below reflect typical Ingalls jobs we have invoiced. Your exact number depends on square footage and category.
- Emergency extraction and 3-day dry-out: $1,200 to $2,800
- Subfloor patch (4 by 4 section): $400 to $900
- Hardwood refinish (kitchen footprint): $1,800 to $4,500
- Laminate replacement (whole kitchen): $2,500 to $6,000
- Cabinet toe-kick and base repair: $300 to $1,400
- New supply line and angle stop install: $150 to $400
- Mold remediation if leak was hidden 30+ days: $1,500 to $4,000
For a deeper breakdown by line item, read our complete water damage cost breakdown.
What to Document Before Anyone Touches the Floor
- Photos of the dishwasher pulled out, with the leak source visible
- Photos of the wet subfloor and any staining on cabinet walls
- Moisture meter readings on each flooring type (we provide these in the report)
- The make, model, and age of the dishwasher
- Receipt or warranty info for the appliance
- Date you first noticed the issue (be honest, adjusters check)
- Video walkthrough narrating what you see, time-stamped on your phone
Insurance Claim Language That Helps
How you describe the loss matters. Use these phrases when you call your carrier.
- "Sudden and accidental discharge from a household appliance"
- "Hidden water damage to subfloor and cabinetry"
- "Category 2 gray water loss per IICRC S500"
- "Mitigation began within 24 hours of discovery"
Long-term seepage (more than 14 days) is often excluded. If your leak was slow and hidden, our techs document the indicators that support a sudden-discharge finding when the evidence supports it. We do not coach you to misrepresent timing.
DIY vs. Calling a Pro
- Handle yourself: Surface puddle, dry within an hour, no swelling, no smell
- Call Ingalls Water Restoration: Water reached the subfloor, cabinets are swelling, more than 10 square feet affected, or you smell mildew
- Call immediately: Standing water has been there overnight, ceiling below the kitchen shows staining, or anyone in the home has respiratory issues
Similar appliance leaks behave the same way under the floor. If you also have laundry concerns, our washing machine flood repair guide walks through the same diagnostic flow.
Preventing the Next Leak
- Swap the rubber supply line for a braided stainless line every 5 years
- Install a pan with a leak sensor under the dishwasher during any kitchen remodel
- Run the disposal before starting a wash cycle to clear the drain path
- Wipe the door gasket monthly and check for cracks or food buildup
- Tighten the drain hose clamp at the disposal once a year
- Add a smart shutoff valve tied to a leak detector for whole-home protection
The Ingalls Response Timeline With Ingalls Water Restoration
- 0 to 60 minutes: Phone triage, ETA, and shut-off guidance
- Within 2 hours: Tech on site for most Ingalls addresses
- Day 1: Extraction, containment, equipment placement, photo documentation
- Days 2 to 4: Daily moisture checks, adjuster coordination
- Day 5+: Equipment pulled, repair scope finalized, rebuild scheduled